Monday, September 26, 2011

Two Steps Forward, One Step Back

Note to Readers:  Since I haven't been updating the blog regularly, I've added an email subscription feature on the top right.  If you enter you're email address, you will be notified when I post an update.  It keeps you from checking the blog only to see there is nothing new.  Hope you find it useful.

I continue to make progress toward my goal -- except when I'm not. 

And I'm not making progress when I have to take things off the car and redo them.  Today, I'm referring to the radiator.

This afternoon, I drained the coolant out of the engine so I could remove the radiator.  This was partly planned and partly unplanned.  The planned part involves permanently installing the cooling fan and attaching the radiator to the frame.  See, in my mad desire to get the engine started a couple months ago, I used zip-ties to mount the radiator and a wooden frame to hold the fan.  I haven't wanted to take the radiator back off since I won't be able to run the engine until it's back together again, but in the name of progress, I had to do it.


It's just a hunch that my temporary installation wouldn't pass inspection anyway so I got an aluminum box to hold the fan (painted black) and I'm working on a way to hold the radiator correctly.  As it turns out, mounting the radiator is not easy.  The unit is designed to stand vertically (as it would be in most cars).  In my case, it is tilted about 45 degrees so the weight of the radiator, fan and coolant is resting on four thin aluminum tabs.  I'm sure that over time with the heating/cooling and vibration, it will crack (ie, leak).  So I'm spending a little extra time now to avoid a big problem later.  I expect to tackle that tomorrow.

The unplanned part of this detour is to fix a coolant leak (I won't pass inspection with that either).  Again, in my haste to get the engine started, I saw that the water inlet on the engine didn't fit correctly and I tried to glob extra sealant on it, but it immediately started leaking as soon as the engine turned-over.  Now, I can hopefully fix it permanently.

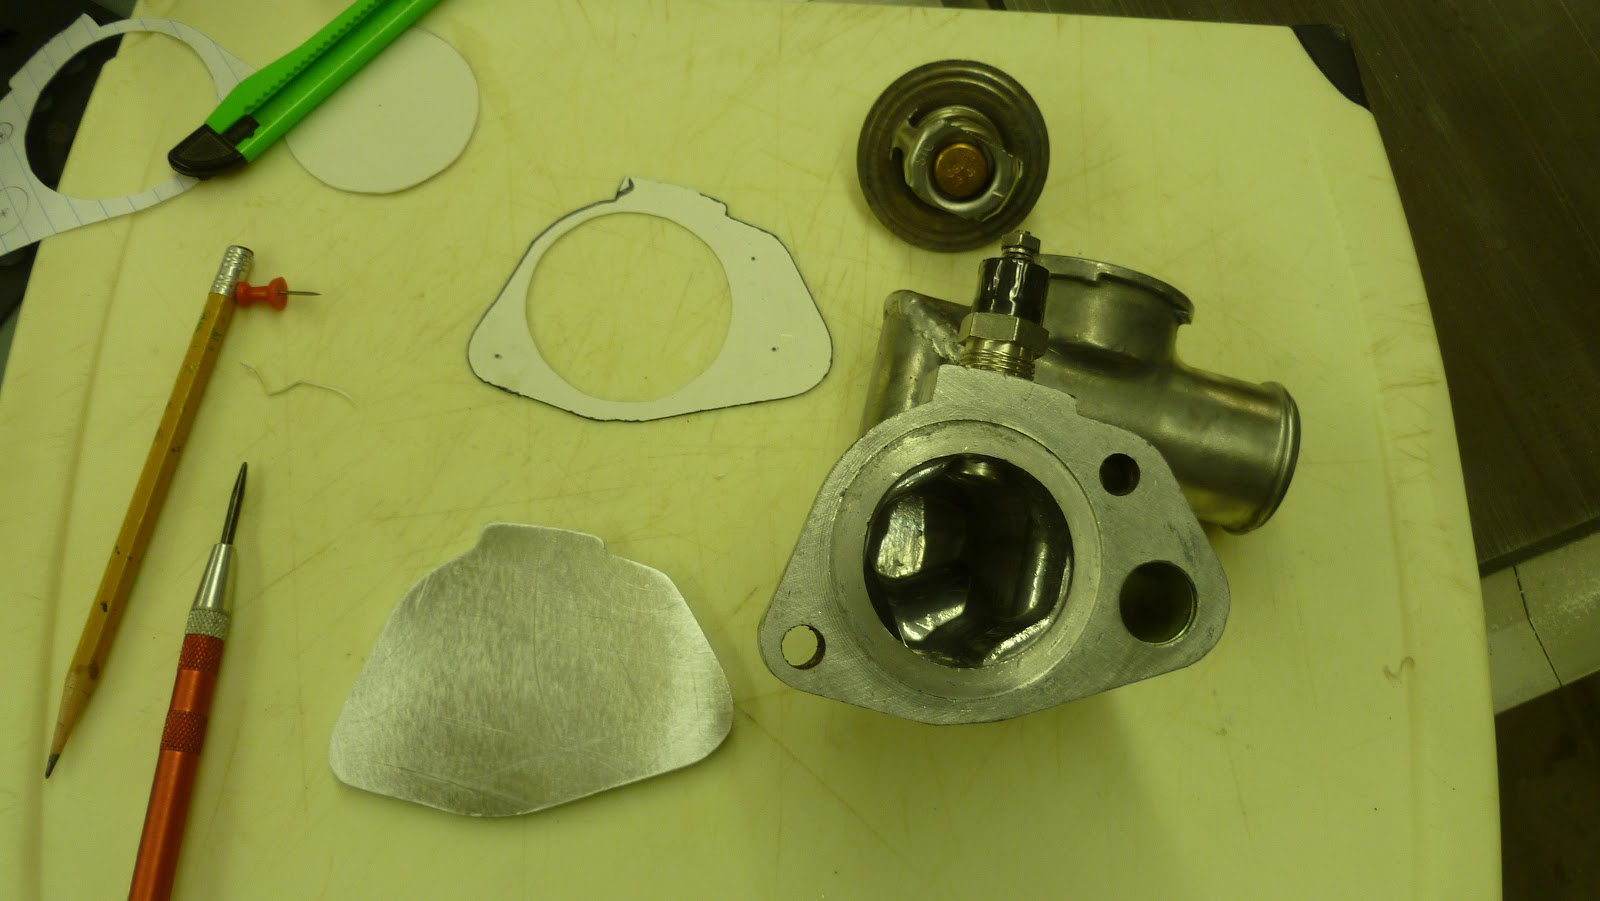
My plan is to make an adapter that will help the coolant channels line up correctly.  I'm not sure why I even have this problem, but it may be because the parts I used on the engine span nearly 40 years of design evolution.  Anyway, I cut a blank out of aluminum and have started to drill holes through it at precise angles so the coolant has a place to flow other than on my garage floor.

Here is a picture of the water inlet and the aluminum blank on the lower left.

And here is a picture after the first two holes were drilled.  I'm testing the fit on the engine side.

Hopefully, this will work.  Unfortunately, I won't know until I put it all together again and start the engine.

In other news, I'm almost done with the brake lines.  I'm going to try to finish those tomorrow too.  After that, I'll be getting close to having a 2000 pound go-kart!

Friday, September 23, 2011

I'm Back!

Here it is, the middle of September already.  Hard to believe.  Well, shortly after my last post (back on August 5th), I decided it was time to take a short break from the car and pay more attention to the rest of my life (like family, friends, vacations, etc.).  What a great month I had!  A family vacation in Colorado filled with white water rafting, hot air ballooning, mountain biking and hiking.  Wonderful visits from friends near and far.  More trips to Vermont and California.  A hurricane.  And last but not least, the start of school.

This week, I finally got myself back in the garage.  Surprisingly, it was harder than I thought to get back into it.  I went out there Monday and started surveying where I had left off.  There were bolts left on the bench to remind me they had to go back on the car, but now I can't remember where.  There were things to do everywhere I looked.  Where did I leave off?  Where should I get started?

I decided to start with something quick and simple to feel like I accomplished something.  For that, I made and installed a short piece of brake line that I had measured before the break.  It felt good to get something done and that got me going again.  Laurie can tell that I'm back to work because I've already gotten three parts deliveries this week!

I found some old to-do lists and started tackling them.  Here are a few pictures:

This is a shot showing the firewall (the curved black piece behind the engine.  The one thing I did do during my break was to pick-up all the aluminum panels that had been powder coated.  They turned out great!

I test fit the dashboard to see how much room I have for a heater.  I got a little sidetracked by this because I thought I'd have to drill holes in the firewall for the heater (and I will at some point), but I decided to put the heater aside for awhile.  Hopefully, I won't regret putting this off.

I finished the connections for the hydraulic clutch so now it's ready to be filled with fluid and tested.

Here is another aluminum panel that forms the front wall of the driver's side compartment.  The brake master cylinder went in today (the white plastic unit).

I also completed a few other odds and ends:
     - Made a shim to raise the transmission for better alignment with the rear end and to help change the engine angle.
     - Made a magnetic switch to sense when the brake fluid level is too low.  This will be required to pass NJ inspection.
     - Started applying a soundproofing material to the aluminum panels so the car doesn't sound like a tin can.
     - Figured out how to permanently wire the battery and starter (and ordered the parts).

As I've said before, my next goal is to get the car moving under its own power.  I still have to run two more brake lines, bleed the brakes and the clutch, reattach the steering, connect the fuel lines and throttle, and permanently mount the radiator.  I keep telling myself that I'm close.  Maybe about 3 more weeks.

All in all, a good week.