One evening, Laurie and I were watching the History Channel and the show Modern Marvels came on. I laughed when I saw the show was about "grease" (not the musical).
A month later, I'm in my garage and the front suspension just isn't working smoothly. As I researched possible causes, one probable problem was using the wrong grease! I went back to the show and ordered the same type of grease used on the catapults of aircraft carriers. Unfortunately, it only comes in 55 gallon drums so if anyone needs to lube their car (or anything else), come see me. Anyway, it did the trick and now the suspension moves very smoothly. (Note: I was told the grease won't help launch my car from zero to 165 mph in 2 seconds like a real catapult does!).
With the suspension set, I spent today installing the front brakes and tightening the bolts (hopefully for the final time).
It took me about a day to get one side done. I think I had to take it apart about 3 times to fix things and adjust pieces. The other side took 1-1/2 hours. The power of learning!
Now I'm finishing the rear suspension which will be pretty much the same exercise. Here's a couple pictures of the differential that Ben and I installed the other day along with the rear control arms. In case you were wondering, yes, this part of the project will use some of that special grease too!
While I was waiting for the grease delivery, I did a few other things to move the project along. For one, I bought new bushings for the rear spindles and they had to be installed. Here is a picture of one. Notice that there are ridged ends on both sides and it has to be slid through a hole that will hold the narrower, middle section.
I put some of the old, standard grease on it and tried whacking it with a hammer. That didn't work at all. Since it's made of hard rubber, all the hammer did was bounce and it was almost like the bushing was laughing at me. "Ha, Ha, I'm not going in that small hole". I needed a smarter idea so I made my own press using a long threaded rod, some nuts, washers and spacers.
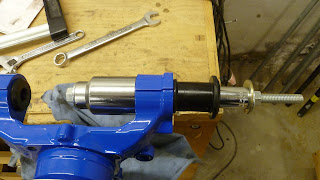
Here is part of the setup.
The idea is that I'll turn the two nuts against each other and slowly draw the bushing into the hole. Here's a picture of the whole setup in action.
The bushing contorted and screamed as I slowly compressed it, but it couldn't overcome the pressure and finally had to go through the hole. Look who's laughing now!
The other thing I did was to layout the sheet metal for the passenger foot area. I used poster board to make a full size template that I'll copy onto sheets of aluminum and then rivet the pieces together.
Looks like I'll be making another trip to Metal Supermarket. Aisle 6, I believe.


No comments:
Post a Comment