Happy New Year! Rested, refreshed and ready for 2012!
Can you believe that I'm celebrating the one year anniversary of this project? With any luck, it will have only taken me a year longer than I thought. Here is a picture from January 3, 2011 when I was picking up the frame from the powder coater.
I have to keep reminding myself of how much I've accomplished since I am usually focusing on how much I still have to do.
I spent most of my time in December working on the interior panels and some wiring. The interior is almost all together. Carpet and other finishing will come later.
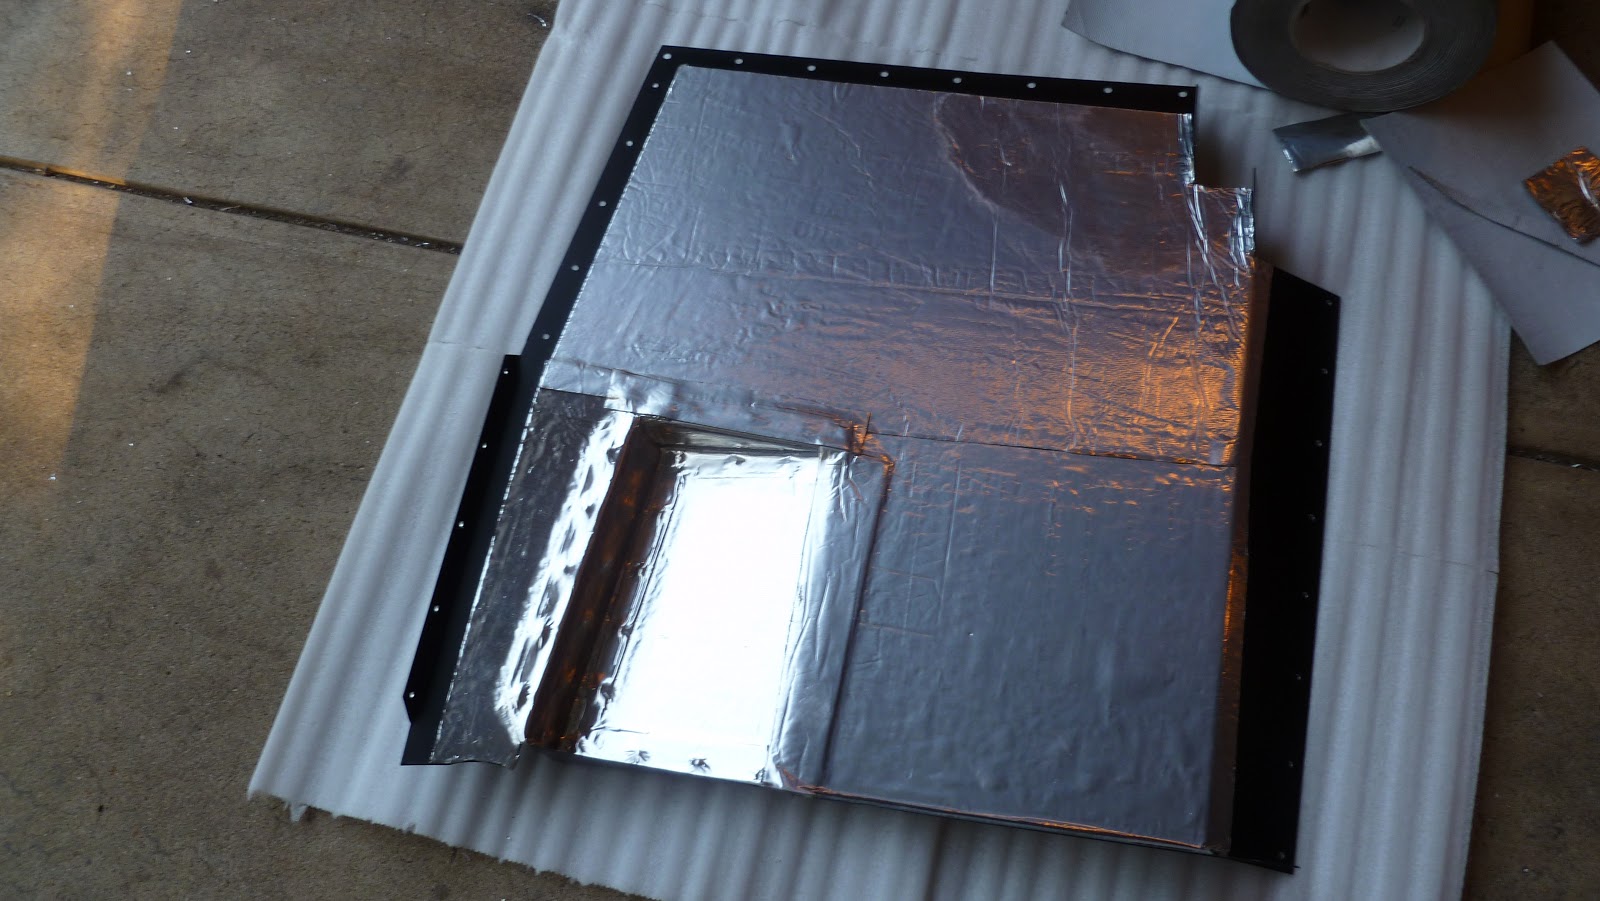
Prepping interior panels for soundproofing.
Installing panels, before...
And after.
Before...
And after.
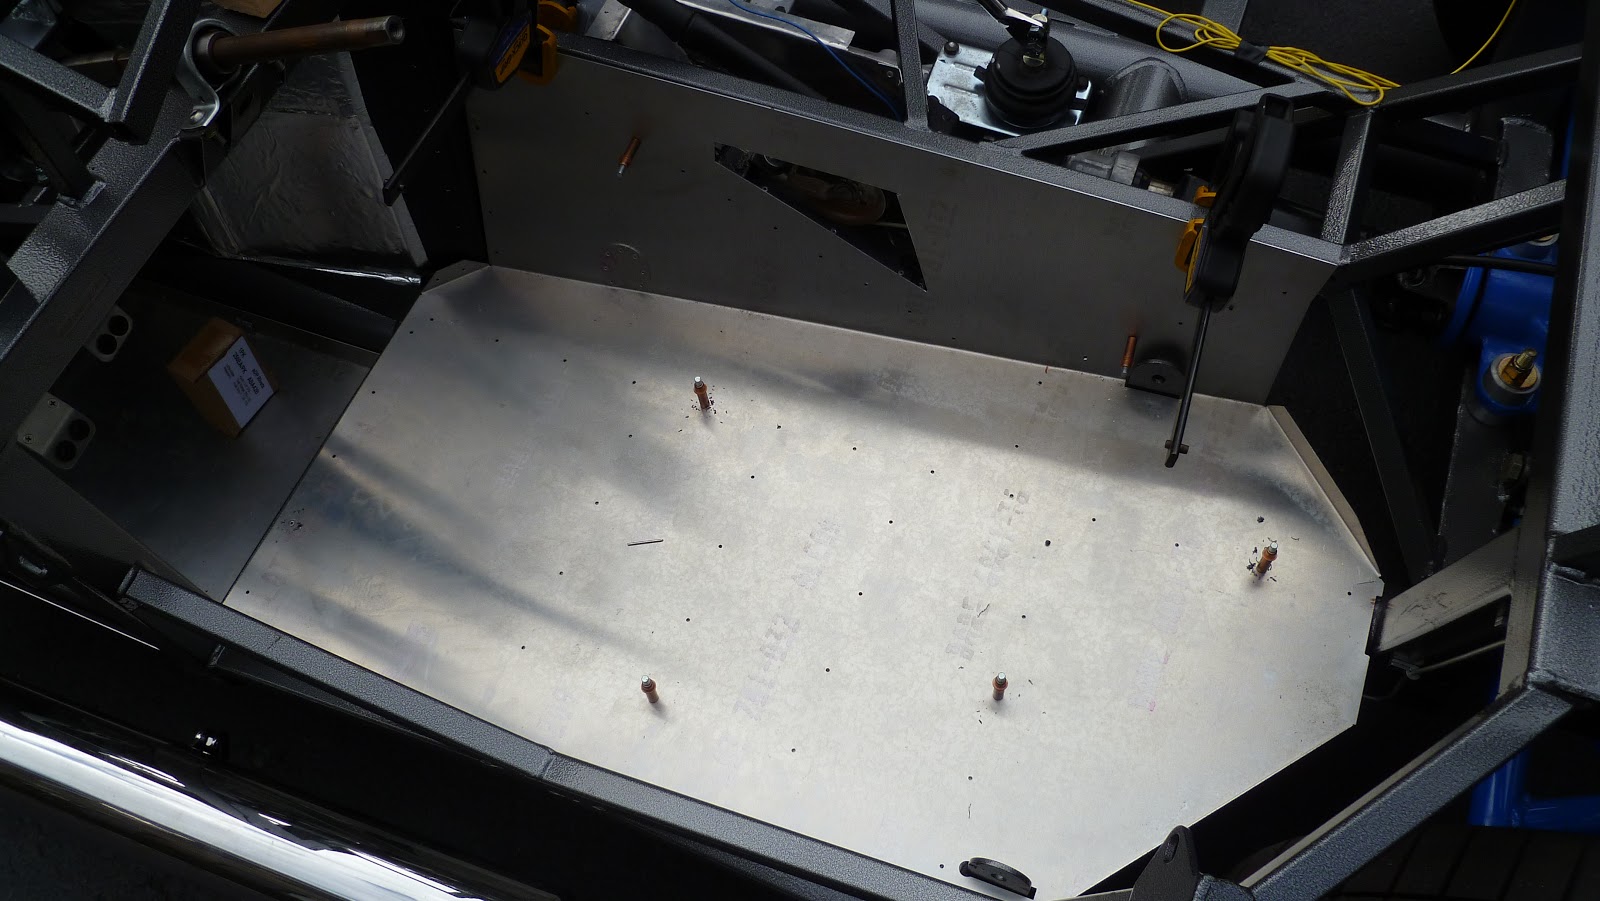
Looking into the passenger foot compartment.
Passenger floorpan.
After the panels were in place using lots of rivets, I installed the fresh air system. I think this will be important to keep our feet and legs cool since they are only a few inches away from the 1200 degree exhaust pipes!
I also made and installed a wiring harness for the battery and starter.
And for Christmas, the world's largest ornament.
Next up -- finding a painter. I have a lead on a local shop that I'll check out. Otherwise, I'm sure I'll find someone who will take on this project.
Wednesday, January 4, 2012
Sunday, December 11, 2011
Looking Ahead
It's been awhile since my last post, but that doesn't mean I haven't been busy. Last time, I was getting all tangled up in wiring issues. Fortunately, I have made some progress in that area including a "first draft" full layout of the dash.
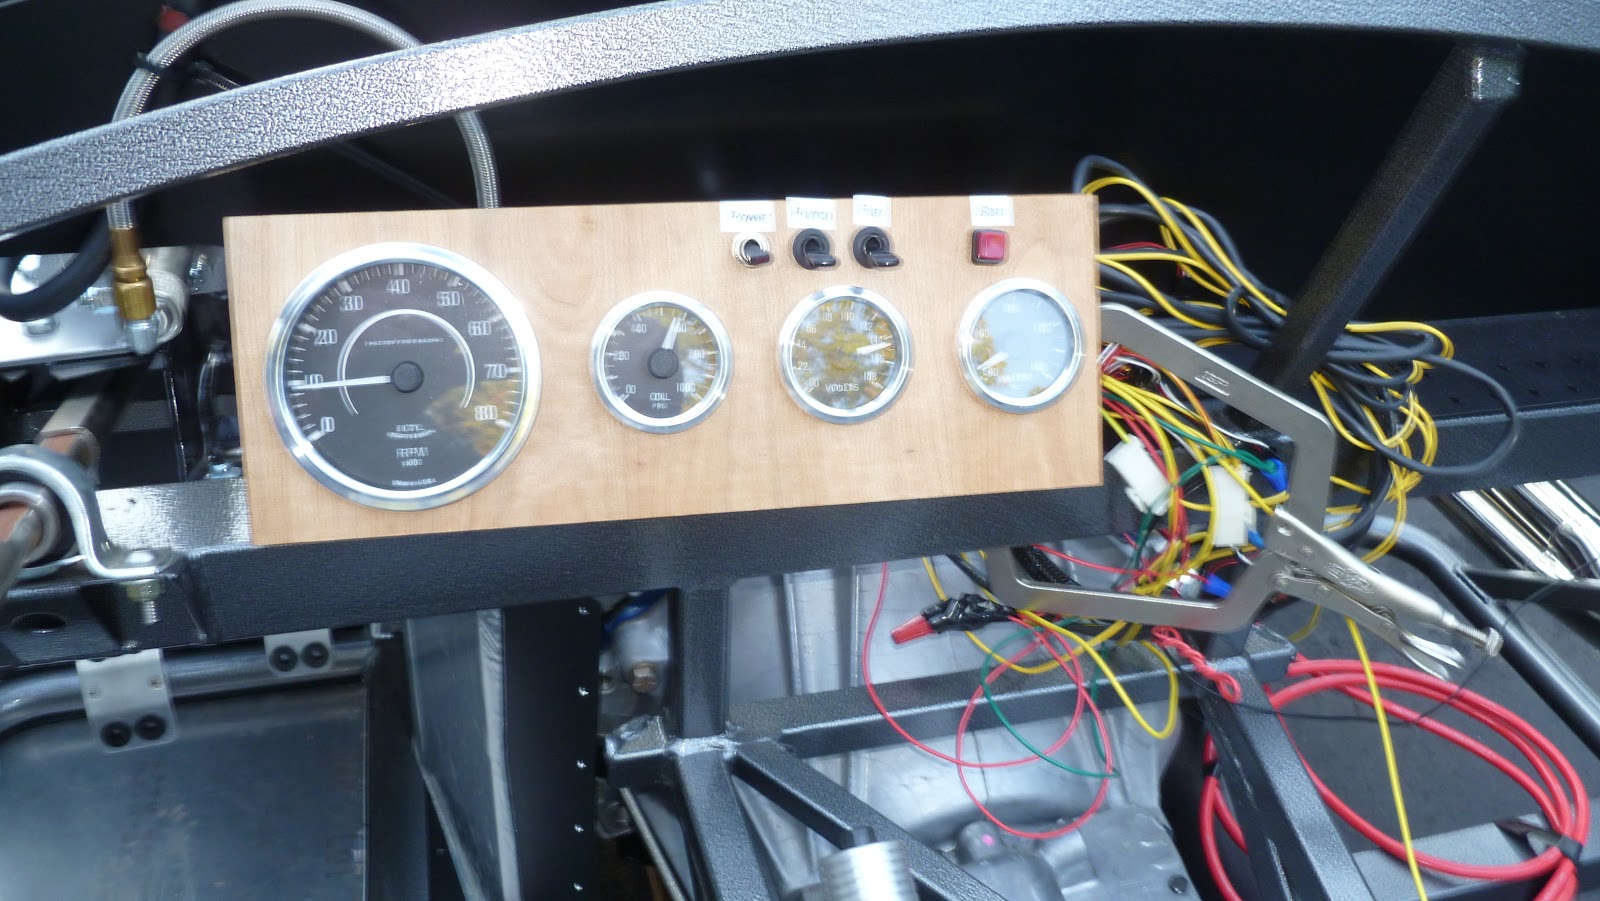
Here is a picture of my temporary dash. It doesn't look too bad and I even considered just putting a coat of varnish on it to have a fancy wood inlay dashboard.
Instead, I'm going with something more traditional for this car. I have the cutouts for all the gauges and a few switches. The dash will be covered in black leather to match the rest of the interior. And the glovebox will go over on the right. I did make a template of the door, but haven't cut it out yet.
I started to make some decisions on the details of the design. The primary switches will all have blue indicator lights and most of the switches will be polished aluminum.
Here are a few examples waiting for their new home.
Of course, not all switches come with blue indicator lights so in some cases, I had to improvise. The switch I wanted to use for the turn signals only came in green or red. Fortunately, my hunch was right and I could pry the switch open to change the LED.
I never imagined I'd have to get down to the level of redesigning switches, but I knew it would always bother me to have all blue and one green.
One of the fun things I've been able to do is design some circuits to control parts of the electrical system. Here is a prototype of a circuit that will open and close a damper for the fresh air system. Notice the blue LED on the right. That's going into the switch above.
It's been at least 25 years since I've worked on any circuits and I'm pretty proud of myself (and yes, it does work). I did realize though, back when I used to work on things like this I had test equipment that really helped to figure out problems. And then, I had a great idea! Since it's almost Christmas, I asked Santa for an oscilloscope. It didn't take long for all my friends to start with the jokes, but I still hope I get it anyway.
I picked out speakers and I hope they fit. Here, I'm testing them on my home amp and ipod.
Any it all comes together with wire, lots of wire.
Things seemed to be moving along, but I couldn't sleep the other night as I thought about how long it's going to take to do all the wiring, do all the interior work, finish and install all the remaining aluminum panels, fit the body, install all the body trim, get it prepped and painted, and then do all the final assembly. And then I remembered something a read early on about body shops just needing the fiberglass body shell to do the painting, not the whole car. Aha! I realized that what I should do is fit the body, doors, hood and trunk now so I can get it to the painter and while it's there, work on the electrical and interior in parallel. This could save me two months! And the guys at the monthly cobra breakfast this morning confirmed my plan will work. So that's what I'm doing.
I changed gears (no pun intended) and started work to get the body on. That means getting all the wheel wells and other aluminum body panels in place. Since it's starting to get cold out, I had to do some prep work inside so the metal would be warm enough to paint. I thought my kitchen floor would be perfect. Laurie wasn't so sure.
I got 15 panels undercoated and ready to install. Here are a few pictures of the radiator cowling and front wheel wells.
My goal is to get everything prepared for the body before Christmas and start the body installation right after the holidays. Hopefully I can get the body to the painter by early February and get it back in March. By then I should have the electrical and interior work done. Could I be on the road in April? -- if so, it will be a great spring!
Here is a picture of my temporary dash. It doesn't look too bad and I even considered just putting a coat of varnish on it to have a fancy wood inlay dashboard.
Instead, I'm going with something more traditional for this car. I have the cutouts for all the gauges and a few switches. The dash will be covered in black leather to match the rest of the interior. And the glovebox will go over on the right. I did make a template of the door, but haven't cut it out yet.
I started to make some decisions on the details of the design. The primary switches will all have blue indicator lights and most of the switches will be polished aluminum.
Here are a few examples waiting for their new home.
Of course, not all switches come with blue indicator lights so in some cases, I had to improvise. The switch I wanted to use for the turn signals only came in green or red. Fortunately, my hunch was right and I could pry the switch open to change the LED.
I never imagined I'd have to get down to the level of redesigning switches, but I knew it would always bother me to have all blue and one green.
One of the fun things I've been able to do is design some circuits to control parts of the electrical system. Here is a prototype of a circuit that will open and close a damper for the fresh air system. Notice the blue LED on the right. That's going into the switch above.
It's been at least 25 years since I've worked on any circuits and I'm pretty proud of myself (and yes, it does work). I did realize though, back when I used to work on things like this I had test equipment that really helped to figure out problems. And then, I had a great idea! Since it's almost Christmas, I asked Santa for an oscilloscope. It didn't take long for all my friends to start with the jokes, but I still hope I get it anyway.
I picked out speakers and I hope they fit. Here, I'm testing them on my home amp and ipod.
Any it all comes together with wire, lots of wire.
Things seemed to be moving along, but I couldn't sleep the other night as I thought about how long it's going to take to do all the wiring, do all the interior work, finish and install all the remaining aluminum panels, fit the body, install all the body trim, get it prepped and painted, and then do all the final assembly. And then I remembered something a read early on about body shops just needing the fiberglass body shell to do the painting, not the whole car. Aha! I realized that what I should do is fit the body, doors, hood and trunk now so I can get it to the painter and while it's there, work on the electrical and interior in parallel. This could save me two months! And the guys at the monthly cobra breakfast this morning confirmed my plan will work. So that's what I'm doing.
I changed gears (no pun intended) and started work to get the body on. That means getting all the wheel wells and other aluminum body panels in place. Since it's starting to get cold out, I had to do some prep work inside so the metal would be warm enough to paint. I thought my kitchen floor would be perfect. Laurie wasn't so sure.
I got 15 panels undercoated and ready to install. Here are a few pictures of the radiator cowling and front wheel wells.
My goal is to get everything prepared for the body before Christmas and start the body installation right after the holidays. Hopefully I can get the body to the painter by early February and get it back in March. By then I should have the electrical and interior work done. Could I be on the road in April? -- if so, it will be a great spring!
Friday, October 28, 2011
Just Around the Bend
Have you ever gone hiking in the mountains and after many hours you start to get tired, but keep going because you're convinced your destination is just around the next bend in the trail? I'm like that, but often find that the trail just keeps going and going. It's disappointing to find you're not there yet, but it always feels good when you finally do make it to your goal.
I was at that point in my project this week. I had just come off the great experience of really driving the car for the first time and now I'm thinking I just have to connect the wiring and slap on some carpet. After all, how hard could the wiring be for an electrical engineer? I know the basics -- a headlight needs positive and negative wires, a switch and a connection to the electricity source. In theory, yes, in practice? Well, let's just say I went around another bend in the trail.
It turns out that the wiring isn't too bad, it's all the other aesthetic decisions that are hard for me. My dash will end up with many switches, indicators and gauges. Where should I put them all so it looks good and is functional? What type of switches do I want (I never realized how many options are out there)? Should the switches light up? If so, what color? And so on... How am I going to fit everything I want behind the dash (a heater, glove box, wiring, defrosters, etc.) when there isn't that much room?
It quickly became overwhelming. I had to walk away for awhile, but when I came back to it, I started to write down every function and control I thought I'd want. It turned out to be a long list. The current count is 14 switches, 5 indicator lights, 7 gauges and various other items. Now at least, I can start to play around with different ideas and that could be fun. I also decided that I'd keep mocking-up the parts of the dash until I have a full plan before I commit to making anything permanent -- that takes a lot of pressure off.
Here's one part that I've worked out -- the heater. I wanted it hidden behind the dash and the area is only about 8" x 8". To start, I found the smallest aftermarket heater out there (although I did see one guy hook up two hair dryers as heaters, but I'm not going there).
It has a blower on top and a small radiator inside that hot water from the engine flows through. The hot air will be forced out of the bottom of the unit and it's designed to fit under the dash of an older car. Unfortunately, for a few reasons, this won't work for me, but I thought I could reuse the components somehow.
So I took it apart.
After playing around and thinking about it overnight, I think I found a solution. By putting the blower on the bottom and the outlets at the top, I can run small hoses over everything to the spots where I want the heat outlets. And since the outlets are at the top, it will be easier to hookup the defrost vents.
Here's a mock-up of what I'm thinking.
It's small enough to fit, puts the water connections in the right place and hopefully will work out. I'm going to use this as I design other parts of the dash to see how it all works together.
Up next, a glove box.
I was at that point in my project this week. I had just come off the great experience of really driving the car for the first time and now I'm thinking I just have to connect the wiring and slap on some carpet. After all, how hard could the wiring be for an electrical engineer? I know the basics -- a headlight needs positive and negative wires, a switch and a connection to the electricity source. In theory, yes, in practice? Well, let's just say I went around another bend in the trail.
It turns out that the wiring isn't too bad, it's all the other aesthetic decisions that are hard for me. My dash will end up with many switches, indicators and gauges. Where should I put them all so it looks good and is functional? What type of switches do I want (I never realized how many options are out there)? Should the switches light up? If so, what color? And so on... How am I going to fit everything I want behind the dash (a heater, glove box, wiring, defrosters, etc.) when there isn't that much room?
It quickly became overwhelming. I had to walk away for awhile, but when I came back to it, I started to write down every function and control I thought I'd want. It turned out to be a long list. The current count is 14 switches, 5 indicator lights, 7 gauges and various other items. Now at least, I can start to play around with different ideas and that could be fun. I also decided that I'd keep mocking-up the parts of the dash until I have a full plan before I commit to making anything permanent -- that takes a lot of pressure off.
Here's one part that I've worked out -- the heater. I wanted it hidden behind the dash and the area is only about 8" x 8". To start, I found the smallest aftermarket heater out there (although I did see one guy hook up two hair dryers as heaters, but I'm not going there).
It has a blower on top and a small radiator inside that hot water from the engine flows through. The hot air will be forced out of the bottom of the unit and it's designed to fit under the dash of an older car. Unfortunately, for a few reasons, this won't work for me, but I thought I could reuse the components somehow.
So I took it apart.
After playing around and thinking about it overnight, I think I found a solution. By putting the blower on the bottom and the outlets at the top, I can run small hoses over everything to the spots where I want the heat outlets. And since the outlets are at the top, it will be easier to hookup the defrost vents.
Here's a mock-up of what I'm thinking.
It's small enough to fit, puts the water connections in the right place and hopefully will work out. I'm going to use this as I design other parts of the dash to see how it all works together.
Up next, a glove box.
Monday, October 24, 2011
A Real Test
Following a successful trip to the cobra breakfast meeting a couple weeks ago, I decided to push for one more short-term goal: a full test drive. No, I'm not going on the road (yet), but I think it's time to really test the car's capabilities -- braking, acceleration, handling, etc. After all, I have the trailer here and soon it will be getting too cold to take the car out.
My main concern is safety. Therefore, leading up to this test I focused on making sure the car was safe to drive at speed. I installed the roll bar (I can't imagine flipping over, but I'd be really disappointed if it happened and the roll bar was sitting safely in the garage). I checked all the steering and suspension bolts for the proper torque. I also had to install the floor pan, the seat and the harness.
Before I could put in the floor pan, I had to finish some other fabrication and prep some of the parts. First, I had to make an enclosure for the parking brake mechanism. Next time, I'll do this before installing the transmission because I barely had room to work.
It starts (as usual) with a paper template (with lots of trial and error)
It fits around the brake handle
I flattened the template
Traced it onto an aluminum panel and cut it out
I bent the panel along the dotted lines
And installed the finished product
Actually, it was not as easy as it looks!
Then is was time to install the floor pan. I put an undercoating on it to reduce road noise.
I applied silicone on all the contact surfaces so it won't rattle.
Here it is temporarily held in place.
After all the rivets are installed.
The completed floor pan.
Then I installed the driver's seat and safety harness, and it was ready to go.
Early yesterday morning, I trailered the car over to the local mall with its huge parking lot for my test drive. Here it is right before the test.
The driving was great! The only problem I had was that with no fenders, I got showered with pebbles the whole time. I'm glad Laurie came along to watch even though she had just gotten a cast on her leg.
I wish I had gotten more video but I do have one to share. The actual ride was much smoother than the shaky video would imply.
Shortly, after completing this run, the security patrol came back to tell me the car was very impressive, but I couldn't drive it there. I packed up and went home very satisfied.
My main concern is safety. Therefore, leading up to this test I focused on making sure the car was safe to drive at speed. I installed the roll bar (I can't imagine flipping over, but I'd be really disappointed if it happened and the roll bar was sitting safely in the garage). I checked all the steering and suspension bolts for the proper torque. I also had to install the floor pan, the seat and the harness.
Before I could put in the floor pan, I had to finish some other fabrication and prep some of the parts. First, I had to make an enclosure for the parking brake mechanism. Next time, I'll do this before installing the transmission because I barely had room to work.
It starts (as usual) with a paper template (with lots of trial and error)
It fits around the brake handle
I flattened the template
Traced it onto an aluminum panel and cut it out
I bent the panel along the dotted lines
And installed the finished product
Actually, it was not as easy as it looks!
Then is was time to install the floor pan. I put an undercoating on it to reduce road noise.
I applied silicone on all the contact surfaces so it won't rattle.
Here it is temporarily held in place.
After all the rivets are installed.
The completed floor pan.
Then I installed the driver's seat and safety harness, and it was ready to go.
Early yesterday morning, I trailered the car over to the local mall with its huge parking lot for my test drive. Here it is right before the test.
The driving was great! The only problem I had was that with no fenders, I got showered with pebbles the whole time. I'm glad Laurie came along to watch even though she had just gotten a cast on her leg.
I wish I had gotten more video but I do have one to share. The actual ride was much smoother than the shaky video would imply.
Shortly, after completing this run, the security patrol came back to tell me the car was very impressive, but I couldn't drive it there. I packed up and went home very satisfied.
Monday, October 10, 2011
My Trip to the Cobra Breakfast
In the last post Saturday night, the car was running and all that was left was to get it on the trailer. Sounds easy since that's what a car trailer is designed to do. The only problem is that I've never done it before.
At 7am on a beautiful Sunday morning, I started the car and backed it out of the garage (much to the dismay of my neighbors). I pulled it up to the trailer ramps and stopped to make sure everything was lined-up.
After a quick inspection, I got back in the car and stared at the trailer in front of me. What could go wrong, I thought. Maybe the ramps would slip and the car would fall off, or the frame would bottom-out and get stuck, or I would give it too much gas and wouldn't be able to stop before driving off the front of the trailer, or maybe the brakes would lock up and I'd slide off the front of the trailer. With all those positive thoughts running through my head, I started the engine, pressed the gas pedal and let out the clutch.
I'm happy to report that none of those terrible things happened and the car did just what it was supposed to -- it went smoothly up the ramps, and easily stopped up on top. What a relief!
I strapped the car down and headed off to my breakfast meeting. Most of the drive was along the highway and I had to chuckle to myself as I saw car after car pull up alongside the trailer, slow down to check it out and then pull forward with a thumbs-up or a wave. At one point, I watched a motorcyclist do the same thing, but when he pulled forward he signaled to me to lower the window. There we were going 60 mph have a conversation about the car!
When I got to the diner, I knew I wouldn't be able to park in the regular lot with a trailer, but there is a bank next door so I pulled in there. As I parked, I saw 6 other cobras lined-up in the diner's lot, but they couldn't see me because of some bushes between the two lots. I quickly figured out an easy way to get their attention -- I started the engine and revved it a few times. Just like a pack of hyenas sensing wounded prey, they had surrounded me in no time.
The guys poked their heads in, around and under everything. I told them to let me know if they saw any problems or had any advice. What I got was "great job", "fantastic", "one of the best I've seen", and "really, a dog gate?". Suddenly, my standing within the group changed. I wasn't just a voyeur any more, I was becoming accepted as an equal. It was a great morning.
I came home with even more enthusiasm to get the car completed. Since it was a beautiful autumn day and I had only driven the car a total of 100 feet so far, I thought I'd test it out a little more. I really wanted to make sure the brakes worked well under a hard stop. So I backed the car to the end of a straight section of driveway, accelerated forward and hit the brakes before reaching the road. The brakes worked pretty good (but I'm still going to do more testing in a parking lot somewhere). The thing that really surprised me was the acceleration. I don't think I've every done 30 mph in my driveway before!
And just for fun, I took it out into the road when no cars were around. I'll need to learn how to be easier on the accelerator.
Next up: electrical and heating/ventilation.
At 7am on a beautiful Sunday morning, I started the car and backed it out of the garage (much to the dismay of my neighbors). I pulled it up to the trailer ramps and stopped to make sure everything was lined-up.
After a quick inspection, I got back in the car and stared at the trailer in front of me. What could go wrong, I thought. Maybe the ramps would slip and the car would fall off, or the frame would bottom-out and get stuck, or I would give it too much gas and wouldn't be able to stop before driving off the front of the trailer, or maybe the brakes would lock up and I'd slide off the front of the trailer. With all those positive thoughts running through my head, I started the engine, pressed the gas pedal and let out the clutch.
I'm happy to report that none of those terrible things happened and the car did just what it was supposed to -- it went smoothly up the ramps, and easily stopped up on top. What a relief!
I strapped the car down and headed off to my breakfast meeting. Most of the drive was along the highway and I had to chuckle to myself as I saw car after car pull up alongside the trailer, slow down to check it out and then pull forward with a thumbs-up or a wave. At one point, I watched a motorcyclist do the same thing, but when he pulled forward he signaled to me to lower the window. There we were going 60 mph have a conversation about the car!
When I got to the diner, I knew I wouldn't be able to park in the regular lot with a trailer, but there is a bank next door so I pulled in there. As I parked, I saw 6 other cobras lined-up in the diner's lot, but they couldn't see me because of some bushes between the two lots. I quickly figured out an easy way to get their attention -- I started the engine and revved it a few times. Just like a pack of hyenas sensing wounded prey, they had surrounded me in no time.
The guys poked their heads in, around and under everything. I told them to let me know if they saw any problems or had any advice. What I got was "great job", "fantastic", "one of the best I've seen", and "really, a dog gate?". Suddenly, my standing within the group changed. I wasn't just a voyeur any more, I was becoming accepted as an equal. It was a great morning.
I came home with even more enthusiasm to get the car completed. Since it was a beautiful autumn day and I had only driven the car a total of 100 feet so far, I thought I'd test it out a little more. I really wanted to make sure the brakes worked well under a hard stop. So I backed the car to the end of a straight section of driveway, accelerated forward and hit the brakes before reaching the road. The brakes worked pretty good (but I'm still going to do more testing in a parking lot somewhere). The thing that really surprised me was the acceleration. I don't think I've every done 30 mph in my driveway before!
And just for fun, I took it out into the road when no cars were around. I'll need to learn how to be easier on the accelerator.
Next up: electrical and heating/ventilation.
Saturday, October 8, 2011
It's Alive!
And then there was more...
And still more...
Tomorrow morning I hope to get the car onto my trailer and bring it to the Cobra Club breakfast meeting.
What a milestone, and the best part is that I have terrific memories of sharing this with my family!
Under the Gun
As of my last post on Wednesday, I was about a day behind my plan to get the car running. The list of things was definitely getting shorter though. The thing is, I was so focused on getting stuff done, that I didn't stop to take too many pictures.
Here's a quick rundown of Thursday's activity:
Made a bracket for the fuel regulator and installed it.
Connected all the permanent fuel lines.
Installed the radiator, fan and grille.
Shortened all the radiator lines to match the final radiator location.
Installed the brake master cylinder.
Reconnected the steering.
Calibrated the timing pointer on the engine.
Yesterday I did stop to take a few pictures of the progress as you'll see below.
Something I had to do was to start installing the inner body panels. For example, I need a floorboard under the pedals because up until now, the car is powered the same as the Flintstones car.
And to support the floorboard, I had to install two other panels. This was another new challenge -- how to align all these panels to each other, drill holes for rivets, add silicone to all the joints, and finally rivet the pieces together.
Here is the front panel on the driver's side. The copper studs are actually temporary rivets used in aircraft manufacturing. As I drilled each hole, I installed a temporary rivet to hold the pieces in alignment.
Looking down between the engine and the driver compartment. You can see that I had to remove the exhaust on this side.
The interior of each panel also is getting a layer of heat/noise barrier. I cut out the pieces to size and stick them in place. There is an aluminum facing to reflect heat. This will all eventually be covered with carpet.
The exterior of panels that won't be visible will also get an undercoating treatment to reduce noise.
Here Ben is helping to reinstall the exhaust.
Getting close. The driveshaft goes in.
Connected the throttle cable.
Cleaned-up the temporary wiring.
Now you can see the floorboard under the pedals.
And here's the radiator and grille painted a semi-gloss black.
Today was all about getting things done. Sorry, no more pictures. The main accomplishment was getting the brakes and clutch bled (ie, filled with fluid). Many thanks to Ben for helping get it done. As usual, it took much longer than I thought it would (mostly because I ignored the advice to prime the master cylinder with fluid before installing it).
I got the engine running again after no starts in nearly two months.
Finally, it was time to put the tires back on, and thereby, crossing the last item off the list. It's ready to go!
Here's a quick rundown of Thursday's activity:
Made a bracket for the fuel regulator and installed it.
Connected all the permanent fuel lines.
Installed the radiator, fan and grille.
Shortened all the radiator lines to match the final radiator location.
Installed the brake master cylinder.
Reconnected the steering.
Calibrated the timing pointer on the engine.
Yesterday I did stop to take a few pictures of the progress as you'll see below.
Something I had to do was to start installing the inner body panels. For example, I need a floorboard under the pedals because up until now, the car is powered the same as the Flintstones car.
And to support the floorboard, I had to install two other panels. This was another new challenge -- how to align all these panels to each other, drill holes for rivets, add silicone to all the joints, and finally rivet the pieces together.
Here is the front panel on the driver's side. The copper studs are actually temporary rivets used in aircraft manufacturing. As I drilled each hole, I installed a temporary rivet to hold the pieces in alignment.
Looking down between the engine and the driver compartment. You can see that I had to remove the exhaust on this side.
The interior of each panel also is getting a layer of heat/noise barrier. I cut out the pieces to size and stick them in place. There is an aluminum facing to reflect heat. This will all eventually be covered with carpet.
The exterior of panels that won't be visible will also get an undercoating treatment to reduce noise.
Here Ben is helping to reinstall the exhaust.
Getting close. The driveshaft goes in.
Connected the throttle cable.
Cleaned-up the temporary wiring.
Now you can see the floorboard under the pedals.
And here's the radiator and grille painted a semi-gloss black.
Today was all about getting things done. Sorry, no more pictures. The main accomplishment was getting the brakes and clutch bled (ie, filled with fluid). Many thanks to Ben for helping get it done. As usual, it took much longer than I thought it would (mostly because I ignored the advice to prime the master cylinder with fluid before installing it).
I got the engine running again after no starts in nearly two months.
Finally, it was time to put the tires back on, and thereby, crossing the last item off the list. It's ready to go!
Subscribe to:
Posts (Atom)