I just heard from the painter that the body should be done in about two weeks! That's great except now I'm in a panic to get everything done.
I started to run the wiring
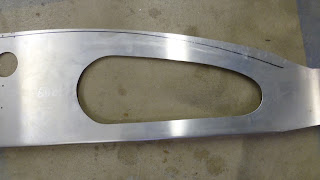
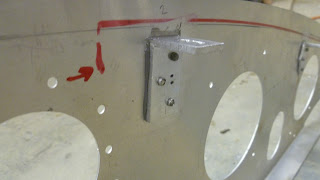
I still have to finish making the trunk panels. The basic design had only two panels, but I decided to squeeze more room into the trunk and now I have twelve panels that I had to fabricate, fit and install. I'll have to remove the gas tank to get them all in place.
The amount of work to do is ridiculous. Can I get it all done? Stay tuned to find out.
Thursday, June 21, 2012
Sunday, June 3, 2012
Is the End in Sight?
Maybe not yet, but I'm definitely getting closer!
I've been knocking-out a bunch of mini-projects and here's a sampling:
I started to install the modules that will control the electrical system. It's actually a computer network. The main computer picks-up signals from the switches and tells the other two computers (one in the engine compartment and one in the trunk) what to do. The remote computers will control the lights, fan, wipers, etc.
The main computer slides up behind the dash on the bracket that I made. Once it's programmed, I shouldn't have to access it, but I can always slide it down if I need to.
Here is the front computer in place. I didn't want to make it visible so I put it on a hinge and it will flip up out of sight. Here is a picture of the computer tilted down toward the engine.
And here is one from the opposite angle of the computer tilted up. This area is under the front fender so it won't be visible once the body is on.
I finished insulating the firewall. You can see the heater installed in the center.
Here is a picture of the valve that will control the heater. The silver hoses on the left connect to the engine and when the valve is closed, the hot engine coolant will return to the radiator. When the valve is open, the fluid will flow through the pipes on the right and into the heater.
Since I had to drain the coolant from the engine to install the heater valve, I also fixed a small coolant leak in the front of the engine. It was a case of using the wrong gasket.
I made a bracket to hold the wiper motor using some stainless steel pipe that I cut in half.
I made a hinge for the back.
And welded brackets on the front to mount it the the frame and to hold it closed around the motor.
Here is it after installation (I painted it black). The wiper system is from a 1968 MGB. You can also see the heater valve under the wiper motor.
I started working on the glove box. Here is a template that I made with the basic shape of the door. This matches the style of the original car.
Here it is cut out.
I also made and attached brackets that will hold the dash to the frame.
I found these great recessed rivets to use on the dash so when it's covered, it will all be flush.
I made the interior of the glove box.
It has an access panel so I can get to the fuses.
This is what the dash looks like now. From here it's going to start looking very messy with lots of wires running all over.
Wow, after looking at all these pictures even I feel like I'm making lots of progress. Sometimes it's hard to see the forest for the trees. Very soon I'll be ready to cover the dash and I already have anxiety over that.
And you wondered about the body? It has primer on the it and will start to get color applied next week. But I think I'll keep those pictures to myself.
I've been knocking-out a bunch of mini-projects and here's a sampling:
I started to install the modules that will control the electrical system. It's actually a computer network. The main computer picks-up signals from the switches and tells the other two computers (one in the engine compartment and one in the trunk) what to do. The remote computers will control the lights, fan, wipers, etc.
The main computer slides up behind the dash on the bracket that I made. Once it's programmed, I shouldn't have to access it, but I can always slide it down if I need to.
Here is the front computer in place. I didn't want to make it visible so I put it on a hinge and it will flip up out of sight. Here is a picture of the computer tilted down toward the engine.
And here is one from the opposite angle of the computer tilted up. This area is under the front fender so it won't be visible once the body is on.
I finished insulating the firewall. You can see the heater installed in the center.
Here is a picture of the valve that will control the heater. The silver hoses on the left connect to the engine and when the valve is closed, the hot engine coolant will return to the radiator. When the valve is open, the fluid will flow through the pipes on the right and into the heater.
Since I had to drain the coolant from the engine to install the heater valve, I also fixed a small coolant leak in the front of the engine. It was a case of using the wrong gasket.
I made a bracket to hold the wiper motor using some stainless steel pipe that I cut in half.
I made a hinge for the back.
And welded brackets on the front to mount it the the frame and to hold it closed around the motor.
Here is it after installation (I painted it black). The wiper system is from a 1968 MGB. You can also see the heater valve under the wiper motor.
I started working on the glove box. Here is a template that I made with the basic shape of the door. This matches the style of the original car.
I also made and attached brackets that will hold the dash to the frame.
I found these great recessed rivets to use on the dash so when it's covered, it will all be flush.
It has an access panel so I can get to the fuses.
This is what the dash looks like now. From here it's going to start looking very messy with lots of wires running all over.
Wow, after looking at all these pictures even I feel like I'm making lots of progress. Sometimes it's hard to see the forest for the trees. Very soon I'll be ready to cover the dash and I already have anxiety over that.
And you wondered about the body? It has primer on the it and will start to get color applied next week. But I think I'll keep those pictures to myself.
Subscribe to:
Comments (Atom)


